
Collaboration Skills: Collaborative Thinking
Collaboration grows when students build on each other’s thinking.
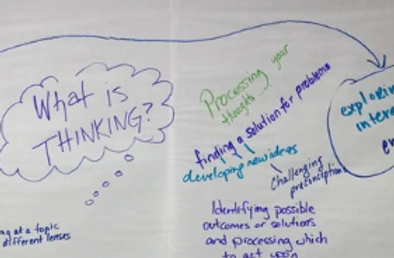
When learners go beyond cooperation and truly co-construct ideas, they shift from working side-by-side to thinking together. The strategies below help teams surface their thinking, respond to one another’s ideas, and strengthen understanding through shared meaning-making.
Want the full context and more background?
EXPLORE THE STRATEGIES
Collaborative Thinking
1-2-3-4 Fingers
Original Source: Oregon Educator Network
Group Size: Whole Class to Small Groups
Grade Level: K–12
Duration: 5–20 minutes
What It Is
1-2-3-4 Fingers is a visible thinking routine that helps teams discuss a question or issue and reach consensus. Students begin by forming their own opinions, then work together to clarify and combine ideas. The finger vote at the end shows how strongly each student agrees with the decision, and helps ensure that everyone’s voice was heard in the process.
Originally adapted from the Oregon Educator Network, this strategy also helps teachers uncover how confident students feel about content, an idea, or a transition. It deprivatizes thinking because every learner must respond first as an individual, giving quieter or less vocal students a visible way to participate. The discussion that follows helps teams explore varied perspectives and deepen their understanding together.
Getting Ready
No materials are needed. Post the prompt on the board or screen and prepare a few follow-up questions in advance to deepen the conversation. Decide whether you’ll tally responses visually (e.g., on a whiteboard or anchor chart), or keep track mentally. If desired, prepare a backup prompt in case the first one doesn’t generate a range of responses. Before launching the activity, briefly remind students that disagreement is normal and valued; it’s how we learn from one another.
How to Do It
For this context, we’ll explain how to use the strategy for the purpose of launching a class discussion.
-
-
Post a visible statement in front of the class, such as “We should never be late.”
-
Ask learners to hold up a number of fingers to indicate how strongly they agree with that topic:
1 = Strongly Agree
2 = Agree
3 = Disagree
4 = Strongly Disagree -
Look for a few learners on opposite ends of the spectrum, and ask them to explain their thinking. Call on other learners to respond to those statements out loud. They can either add to an idea or push back on it.
-
After you feel the learners have a better perspective of the issue being explored, facilitate a debrief.
a. What did you learn from the conversation?
b. Would anyone change their number? Why or why not?
-
Possible Sticking Points
-
Some learners may feel uncomfortable holding up a number if they sense their response is unpopular. Reinforce that all viewpoints are welcome.
-
Students may be influenced by peers’ responses. Set expectations around showing fingers simultaneously and independently.
-
Learners might answer quickly without thinking—build in 10–15 seconds of quiet processing time before showing fingers.
-
You may get uniform responses. If this happens, ask a follow-up like, “Is there a different way to look at this?” or offer a more nuanced prompt.
Facilitation Tips
-
Remind learners that disagreement is healthy. We often learn the most from people who have a different perspective.
-
Share expectations around respectful responses.
-
Practice this strategy with a low-risk prompt, such as the example provided, before tying it to academic content.
-
To facilitate this in a small group, use the same process described for the whole class.
-
Watch for dominant voices—invite varied learners to share, but never force anyone to explain their response.
-
Encourage metacognition by asking students what led them to choose their number or if their thinking process shifted.
-
Consider adding a 1-minute written reflection after the discussion to capture learning.
Why Should I Do This?
-
Showcases the value of deprivatizing thinking.
-
Provides students with an opportunity to build on each other’s learning.
-
Allows opportunities for productive discourse.
-
Learners experience the power of seeing the other side or the nuances of complex issues.
-
Entices learners to seek thought partners as they explore content.
Collaborative Thinking
Chalk Talk
Original Source: School Reform Initiative
Group Size: Whole Class
Grade Level: K–12
Duration: 15-30 minutes
What It Is
Chalk Talk is a silent, unfacilitated, whole-class conversation strategy that creates a visible group concept map. Students silently respond to a central prompt by writing and drawing their thoughts, then build on one another’s contributions. It encourages independent thinking while also strengthening listening, connection, and collaborative meaning-making. The lack of verbal interaction promotes thoughtful engagement and makes space for more voices.
Getting Ready
Create a large space on which to write by either affixing a long piece of butcher paper to a wall or clearing a few connected whiteboards. This space should be continuous and at least 10 feet in length. Post a prompt in the center of the space, such as, “What does it mean to think deeply?” Place a few markers at the base of the space for learners to use to write.
How to Do It
-
Explain to the learners that they will have a completely silent whole group conversation that will take place on the wall, and provide some examples of what they might write. Encourage them to make connections between ideas, or put a star next to thoughts that validate theirs.
-
Open the Chalk Talk discussion by inviting students to visit the space and write their thoughts. Learners should be free to move and write as inspiration strikes them.
-
Monitor the movement of learners. Encourage reluctant learners to visit, and ask others who have already shared several thoughts to give others space.
-
When it seems that a rich (yet silent) conversation has occurred, close the Chalk Talk.
-
Ask learners to take turns visiting the space to read what others have said.
-
Debrief the experience with the learners. Ask them to discuss what they noticed and how they might apply the discussion to the next steps in their learning.
Possible Sticking Points
-
Some students may need modeling or sentence stems to get started.
-
Encourage learners to stay silent—side conversations can derail the strategy.
-
Ensure the writing space is large enough to prevent crowding.
-
Some students may be reluctant to post. Consider keeping a roster and privately chatting with these students to encourage them to contribute.
Facilitation Tips
-
Model how to respond to others’ ideas nonverbally—e.g., drawing a connection line or adding a “+1.”
-
Avoid assigning specific spots—let movement and participation remain organic.
-
Younger learners will need more modeling to understand how to respond in the Chalk Talk. Allow them to draw their thoughts, or use sentence starters that are already written on the Chalk Talk for them.
-
Pre-literate learners will also benefit from modeling and using drawings or images to facilitate discussion. Provide a bank of images.
-
Limit side conversations. Remind students that all discussion should take place in the Chalk Talk itself.
Why Should I Do This?
-
Shifts ownership of thinking to the learners.
-
Creates an artifact of student thinking.
-
Encourages quieter students to contribute without verbal pressure.
-
Fosters deeper connections between individual and group ideas.
-
Promotes equity of voice in classroom discussions.
Collaborative Thinking
Field Trip
Original Source: Oregon Educator Network
Group Size: 3 to 5 students
Grade Level: K–12
Duration: 15-20 minutes
What It Is
A "just in time" strategy from Oregon Educator Network for learners to examine the work of other teams, and have a conversation to develop best practices. For example, learners might share their process for gluing balsa wood in bridges, or how they're keeping track of task completion. In Field Trip, learners appreciate the thinking of others and use what they learn to improve their own products. This strategy encourages learners to deprivatize their work and develop a “we’re all in this together” mentality.
Getting Ready
As your class works, identify a few teams who are using novel ideas, trying new strategies, or producing strong work. Ask these teams if they’re willing to share their process with others. Help them develop a few talking points to prepare for the visit. You can use this note-taking handout to guide observations during the visits.
How to Do It
-
Interrupt a work session and explain to the class that they will have about 15 minutes to take a Field Trip to three other teams. You decide how many groups and how long the visit lasts.
-
During each stop on the Field Trip, visiting teams should:
a. Ask the host group to explain their work or strategy.
b. Ask clarifying questions to better understand the approach (e.g., “How many bulbs did you use?” or “How many times did you practice that line?”). -
After visiting all three teams, Field Trip groups return to their original tables and debrief. Prompt them to share what they observed and what they plan to try as a result. Some helpful prompts include:
a. What were the trends we saw?
b. How can we apply what we learned to our work?
c. What are our next steps? -
Optional: Facilitate a whole-class debrief using questions like:
a. How did this activity help you?
b. How did this activity make you feel?
c. How does this activity help us as a class?
Possible Sticking Points
-
Some learners may feel nervous about sharing their work. Remind them that everyone has something valuable to offer.
-
For younger learners, 15 minutes of independent focus may be too long a period. Try shorter rotations or conduct the Field Trip as a whole class.
-
Some learners may not know what questions to ask. Offer sentence stems such as:
“I’m not sure I understood when you said ___. Could you say more about that?”
or “I don’t understand ___. Can you explain it?”
Facilitation Tips
-
This strategy is a perfect fit in the Workshop Model. Use it during the reconnection time.
-
In order for this strategy to be most effective, you must use it regularly with your students. They will feel more comfortable sharing, and there will be more opportunities for different groups to share.
-
Model a stop on the Field Trip before asking learners to visit groups on their own. You might facilitate this as a whole class for younger learners.
-
Some learners may be hesitant to share their work and best practices. Remind them that everyone can learn from everyone.
-
Younger learners may not have the endurance to focus independently for 15 minutes. Shorten this, and consider conducting the Field Trip as a whole class.
-
Some learners might struggle with knowing what questions to ask to understand. Offer sentence starters such as, "I’m not sure I understood you when you said ___. Could you say more about that?" or "I don’t understand ___."
Why Should I Do This?
-
Helps students deprivatize their thinking in progress.
-
Builds a culture of “we’re in this together.”
-
Celebrates high-quality thinking and makes it visible.
-
Helps learners identify next steps and refine their own work.
-
Encourages metacognition and helps students make intentional decisions.
Collaborative Thinking
Jigsaw
Original Source: Elliot Aronson
Group Size: 4 to 6 students
Grade Level: K-12
Duration: 30-60 minutes
What It Is
The Jigsaw method from Elliot Aronson is one of the most classic ways for learners to build knowledge collaboratively. In this strategy, students become experts in a specific topic or skill and then return to their team to teach it to others. It encourages active engagement, interdependence, and peer teaching—not just presenting information but ensuring comprehension. Jigsaw routines help learners recognize one another as valuable contributors to learning and allow teachers to step back into a facilitation role while learners take the lead.
Getting Ready
Prepare for two types of groups in your classroom: Jigsaw teams and expert groups. Each Jigsaw team will include 4–6 students. Each expert group will contain one member from each Jigsaw team, grouped by topic. Determine the number of expert groups required based on your total number of Jigsaw teams. Provide expert groups with resources, guiding questions, or note-taking templates (you can use this shared document) to support content exploration. Consider how learners will rotate, how long they’ll stay in each phase, and how they’ll share what they’ve learned.
How to Do It
-
Split your class roster into Jigsaw teams with 4-6 learners in each. These are the groups to which learners will return to teach one another.
-
Number learners in the Jigsaw teams, so they are able to regroup into expert groups. The number of students in a Jigsaw team should match the number of expert groups, or be as close as possible. For example, if there are four learners in a Jigsaw team, there will be four expert groups. If there are six learners, there will be six expert groups, as demonstrated in the example on the next page.
-
Provide expert groups with resources to learn knowledge or skills. Each expert group will comprise one student from each Jigsaw team. In these expert groups, learners will study the content and determine what is most essential to teach others. Then, they prepare short presentations to teach their Jigsaw team what they have learned.
-
Return learners to their Jigsaw team, and allow them to take turns teaching their Jigsaw group what they learned in their expert groups.
-
Provide a formative assessment to check for understanding of content or mastery of skills.
Possible Sticking Points
-
Learners may lose focus or track of time—use timers or set check-in points.
-
Students may struggle with explaining concepts clearly—consider providing sentence frames or teaching back modeling beforehand.
-
Movement may create confusion—clearly label group locations and review transitions in advance.
Facilitation Tips
-
Preview expectations and co-create group norms before starting.
-
Use visuals, sentence frames, or guided notes to scaffold expert group learning.
-
For younger learners, model a round of the Jigsaw as a full class before trying small groups.
-
Encourage the use of academic language and listening prompts like:
“Can you say more about that?”
“What do we still need to know?” -
Monitor groups and check for equitable participation—intervene if a learner is struggling to engage.
Why Should I Do This?
-
A dynamic way to build knowledge together. Turns learners into teachers, deepening content understanding through peer instruction
-
Creates an environment in which learners see each other as being experts in content or skills. This allows the teacher to shift into a facilitation role, so they are no longer the gate-keeper of knowledge.
-
Builds a classroom culture in which learners rely on each other.
-
Helps teachers assess both content knowledge and communication skills.
Explore All 4 Collaboration Strategy Pages
This is one of four pages in our Collaboration Skills series. Each one is packed with classroom-ready strategies connected to a key domain of collaboration:
-
Relationship Building: Build trust, connection, and a sense of belonging.
-
Goals & Progress: Support accountability through shared goals and routines.
-
Collaborative Thinking: Help students engage in collective idea generation and critical thinking.
-
Feedback: Teach students how to give, receive, and reflect on meaningful feedback.
Visit all four to strengthen student collaboration through clear, actionable practices.
